Ever since IBM has released Tivoli Endpoint Manager 9.0 on 8th March 2013, I've been keen to know about its new features. One of the most interesting feature of TEM 9.0 was, the Server component could now be installed on 64 bit Linux server ( for now only on RHEL6.x releases). This was the first biggest step to port the TEM Server from Windows to Linux, post IBM's BigFix acquisition in 2010.
Four major features of TEM 9.0:
• Extended support for deployment of agents to Solaris 11, Debian 6, and Ubuntu 12.04 in addition to previously released support for Mac OS X 10.8 and Windows 8 and Windows Server 2012.
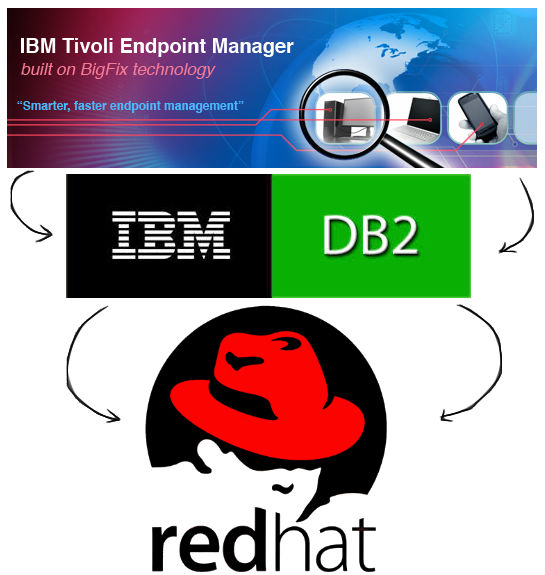
• More flexible deployment options with the addition of support for Red Hat Enterprise Linux and DB2 as an IBM Endpoint Manager Server platform. Prior to this release, TEM server could be installed only on a Windows Server with MS-SQL database.
• Native encryption capabilities for server to client communication and additional security configuration options for managing Internet connected computers and mobile devices.
• New, simplified Representational State Transfer (REST) based application programming interfaces (APIs) and an easy-to-use command line interface.
Let's try out the first feature of TEM 9.0 release: Installing IBM Tivoli Endpoint Manager Server on Linux operating system (RHEL 6) with DB2 as the backend database.
Download http://software.bigfix.com/download/bes/90/ServerInstaller_9.0.649.0-rhel.tgz
Requirements for Installing TEM 9.0 on Linux OS:
• 32 bit compatibility libraries, use whatever version in in the iso's rpm folder.
• Must be previously installed on TEM linux server
• Server or Workgroup editions.
Steps to install TEM 9.0 on Linux:
Deploy RHEL 6.1 or higher as per the above requirement. Make sure that the required RPMs are also installed, if not the best way to install dependencies is using a YUM repository. Refer to this link to configure a local YUM repository from an ISO image or a mounted CD/DVD
Validate the required RPMs are installed by running the below command:
Once done you can start install DB2 10.1 on RHEL 6 system. The final step prior to installing DB2 or IEM 9.0 is to make sure that the name you assigned the server when you installed Linux is present in the /etc/hosts file. By default this will not be the case. You can use the following command line to fix this. Note that you should substitute the appropriate IP Address and hostname to reflect your system.
For example:
# echo “192.168.206.137 temdemo.tem.local” >>/etc/hosts
Note: this necessary step assumes that the IP address of the system will always remain the same. If the server is using DHCP assigned addresses this may not be the case so it is strongly advised that the server be set to use a statically assigned IP address and that address be the one in the /etc/hosts file. If you do not use a static address, you should verify that the current IP address of the system and what is in /etc/hosts matches or the IEM server may not be able to reach the database.
Installing DB2:
Installing db2 using the GUI tool is by far the easier approach as it will handle all the elements needed for a complete install and configuration. This does require that your Linux system have the appropriate desktop components installed. Run the DB2 prereqs util from the db2 installables directory:

Check for failed/error lines indicating missing packages or system requirements ... Here's a sample output of the db2prereqcheck util:

From the above screenshot, you can see that certain packages required for DB2 installation are missing, install them using yum. ( for example: #yum install sg3_utils sg_persist)
After installing the required packages, re-run the db2prereqcheck tool and confirm that all per-requisites have been met by the system.

To start the GUI install tool, from the <DB2 Edition> directory run:
# ./db2setup
This will bring up a java-based GUI installer. You can choose the “Install a Product” option from the menu of the installer, then click the button to "Install New" under the DB2 <Workgroup|Enterprise|Advanced Enterprise> Server Edition Version 10.1 section.
Note: Install in the default dir : /opt/ibm/db2/v10.1
In the UI select default values and enter the required user details. On successful installation you should land up on a screen like:

Once DB2 is installed, verify the installation by checking the install log files for any errors as shown below:

NOTE: TSAMP is another IBM product, used for HA and clustering of DB2. If this is not required, you may ignore this error.
To verify that the installation has completed successfully you can also check for the db2 processes by using the following command:
db2acd.
Once DB2 installation is done and verified, reboot the system and proceed the installation of TEM on RHEL.
Installing Tivoli Endpoint Manager 9.0 on RHEL6.x :
Download the TEM Linux 9.0 installables (installer) from this link: http://software.bigfix.com/download/bes/90/ServerInstaller_9.0.586.0-rhel.tgz . Untar the TEM Linux Server binaries and run the install.sh script. Enter the default values or custom values as per the requirement and proceed with the installation. Refer the Chapter 4 of IBM_Endpoint_Manager_Administrators_Guide for more detailed installation steps. After all values have been entered, you should be able to see the install progress as shown below:

Post install check the status of services:
Note: After installing TEM Server on a Linux system, you need to install the TEM console on a Windows machine. TEM console on a Linux system is not available.
Note: Also note that the current recommendation is that the Linux/DB2 version of IBM Endpoint Manager (a.k.a Tivoli Endpoint Manager or BigFix) only be used in production for deployments of 10,000 endpoints or fewer.
Note: Connect to the Linux TEM server using a TEM console of the same build level on a windows machine, if connection doesn't work, try adding port 52311 in the Linux server's firewall settings as shown below:

Troubleshooting:
If the install fails with error in creating database for TEM ... check for logs /var/log/BES*
If the error message is like :

Tech Links:
http://pic.dhe.ibm.com/infocenter/db2luw/v10r1/index.jsp?topic=%2Fcom.ibm.db2.luw.qb.server.doc%2Fdoc%2Ft0006066.html
Known issues in Tivoli Endpoint Manager 9.0
Client self assist - Technical Support Information for Tivoli Endpoint Manager Administrators
Four major features of TEM 9.0:
• Extended support for deployment of agents to Solaris 11, Debian 6, and Ubuntu 12.04 in addition to previously released support for Mac OS X 10.8 and Windows 8 and Windows Server 2012.
• More flexible deployment options with the addition of support for Red Hat Enterprise Linux and DB2 as an IBM Endpoint Manager Server platform. Prior to this release, TEM server could be installed only on a Windows Server with MS-SQL database.
• Native encryption capabilities for server to client communication and additional security configuration options for managing Internet connected computers and mobile devices.
• New, simplified Representational State Transfer (REST) based application programming interfaces (APIs) and an easy-to-use command line interface.

Let's try out the first feature of TEM 9.0 release: Installing IBM Tivoli Endpoint Manager Server on Linux operating system (RHEL 6) with DB2 as the backend database.
Download http://software.bigfix.com/download/bes/90/ServerInstaller_9.0.649.0-rhel.tgz
Requirements for Installing TEM 9.0 on Linux OS:
• 32 bit compatibility libraries, use whatever version in in the iso's rpm folder.
• audit-libs-2.2-2.el6.i686.rpm
• libselinux-2.0.94-5.3.el6.i686.rpm
• db4-4.7.25-17.el6.i686.rpm
• cracklib-2.8.9-3.3.i386.rpm
• libaio-xxx.rpm
• pam-1.1.1-8.el6.i686.rpm
• cyrus-sasl-lib-2.1.23-8.el6.i686.rpm
• libstdc++
• compat-libstdc++-33
• libselinux-2.0.94-5.3.el6.i686.rpm
• db4-4.7.25-17.el6.i686.rpm
• cracklib-2.8.9-3.3.i386.rpm
• libaio-xxx.rpm
• pam-1.1.1-8.el6.i686.rpm
• cyrus-sasl-lib-2.1.23-8.el6.i686.rpm
• libstdc++
• compat-libstdc++-33
• Must be previously installed on TEM linux server
• Server or Workgroup editions.
Steps to install TEM 9.0 on Linux:
Deploy RHEL 6.1 or higher as per the above requirement. Make sure that the required RPMs are also installed, if not the best way to install dependencies is using a YUM repository. Refer to this link to configure a local YUM repository from an ISO image or a mounted CD/DVD
Validate the required RPMs are installed by running the below command:
#yum install audit-libs.i686 libselinux.i686 cracklib.i686 libaio compat-libstdc++-33 pam.i686 libstdc++.i686 cyrus-sasl-lib.i686
Output should be like :
[root@localhost Packages]# yum install audit-libs.i686 libselinux.i686 cracklib.i686 libaio compat-libstdc++-33 pam.i686 libstdc++.i686 cyrus-sasl-lib.i686
Loaded plugins: product-id, refresh-packagekit, subscription-manager
Updating Red Hat repositories.
Setting up Install Process
Package audit-libs-2.1-5.el6.i686 already installed and latest version
Package libselinux-2.0.94-5.el6.i686 already installed and latest version
Package cracklib-2.8.16-4.el6.i686 already installed and latest version
Package libaio-0.3.107-10.el6.x86_64 already installed and latest version
Package compat-libstdc++-33-3.2.3-69.el6.x86_64 already installed and latest version
Package pam-1.1.1-8.el6.i686 already installed and latest version
Package libstdc++-4.4.5-6.el6.i686 already installed and latest version
Package cyrus-sasl-lib-2.1.23-8.el6.i686 already installed and latest version
Nothing to do
Note: Use only 32 bit compatibility libraries - without x86_64 in the file name.Loaded plugins: product-id, refresh-packagekit, subscription-manager
Updating Red Hat repositories.
Setting up Install Process
Package audit-libs-2.1-5.el6.i686 already installed and latest version
Package libselinux-2.0.94-5.el6.i686 already installed and latest version
Package cracklib-2.8.16-4.el6.i686 already installed and latest version
Package libaio-0.3.107-10.el6.x86_64 already installed and latest version
Package compat-libstdc++-33-3.2.3-69.el6.x86_64 already installed and latest version
Package pam-1.1.1-8.el6.i686 already installed and latest version
Package libstdc++-4.4.5-6.el6.i686 already installed and latest version
Package cyrus-sasl-lib-2.1.23-8.el6.i686 already installed and latest version
Nothing to do
Once done you can start install DB2 10.1 on RHEL 6 system. The final step prior to installing DB2 or IEM 9.0 is to make sure that the name you assigned the server when you installed Linux is present in the /etc/hosts file. By default this will not be the case. You can use the following command line to fix this. Note that you should substitute the appropriate IP Address and hostname to reflect your system.
For example:
# echo “192.168.206.137 temdemo.tem.local” >>/etc/hosts
Note: this necessary step assumes that the IP address of the system will always remain the same. If the server is using DHCP assigned addresses this may not be the case so it is strongly advised that the server be set to use a statically assigned IP address and that address be the one in the /etc/hosts file. If you do not use a static address, you should verify that the current IP address of the system and what is in /etc/hosts matches or the IEM server may not be able to reach the database.
Installing DB2:
Installing db2 using the GUI tool is by far the easier approach as it will handle all the elements needed for a complete install and configuration. This does require that your Linux system have the appropriate desktop components installed. Run the DB2 prereqs util from the db2 installables directory:

Check for failed/error lines indicating missing packages or system requirements ... Here's a sample output of the db2prereqcheck util:

From the above screenshot, you can see that certain packages required for DB2 installation are missing, install them using yum. ( for example: #yum install sg3_utils sg_persist)
After installing the required packages, re-run the db2prereqcheck tool and confirm that all per-requisites have been met by the system.

To start the GUI install tool, from the <DB2 Edition> directory run:
# ./db2setup
This will bring up a java-based GUI installer. You can choose the “Install a Product” option from the menu of the installer, then click the button to "Install New" under the DB2 <Workgroup|Enterprise|Advanced Enterprise> Server Edition Version 10.1 section.
Note: Install in the default dir : /opt/ibm/db2/v10.1
In the UI select default values and enter the required user details. On successful installation you should land up on a screen like:

Once DB2 is installed, verify the installation by checking the install log files for any errors as shown below:

NOTE: TSAMP is another IBM product, used for HA and clustering of DB2. If this is not required, you may ignore this error.
To verify that the installation has completed successfully you can also check for the db2 processes by using the following command:
# ps -ef | grep –I db2
You should see running processes listed for: db2dasrrm, db2wdog, db2sysc, db2ckpwd, db2vend,db2acd.
Once DB2 installation is done and verified, reboot the system and proceed the installation of TEM on RHEL.
Installing Tivoli Endpoint Manager 9.0 on RHEL6.x :
Download the TEM Linux 9.0 installables (installer) from this link: http://software.bigfix.com/download/bes/90/ServerInstaller_9.0.586.0-rhel.tgz . Untar the TEM Linux Server binaries and run the install.sh script. Enter the default values or custom values as per the requirement and proceed with the installation. Refer the Chapter 4 of IBM_Endpoint_Manager_Administrators_Guide for more detailed installation steps. After all values have been entered, you should be able to see the install progress as shown below:

Post install check the status of services:
/etc/init.d/besserver status
/etc/init.d/filldb status
/etc/init.d/gatherdb status
/etc/init.d/besclient status
/etc/init.d/beswebreports status
/etc/init.d/filldb status
/etc/init.d/gatherdb status
/etc/init.d/besclient status
/etc/init.d/beswebreports status
Note: After installing TEM Server on a Linux system, you need to install the TEM console on a Windows machine. TEM console on a Linux system is not available.
Note: Also note that the current recommendation is that the Linux/DB2 version of IBM Endpoint Manager (a.k.a Tivoli Endpoint Manager or BigFix) only be used in production for deployments of 10,000 endpoints or fewer.
Note: Connect to the Linux TEM server using a TEM console of the same build level on a windows machine, if connection doesn't work, try adding port 52311 in the Linux server's firewall settings as shown below:

Troubleshooting:
If the install fails with error in creating database for TEM ... check for logs /var/log/BES*
If the error message is like :
Mon, 01 Apr 2013 07:33:29 -0700 -- [IBM][CLI Driver] SQL30081N A communication error has been detected. Communication protocol being used: "TCP/IP". Communication API being used: "SOCKETS". Location where the error was detected: "192.168.253.135". Communication function detecting the error: "selectForConnectTimeout". Protocol specific error code(s): "115", "*", "*". SQLSTATE=08001
(08001:4294937215)
Mon, 01 Apr 2013 07:33:29 -0700 -- There was an error connecting to the database. Check that you have sufficient database privileges:
Database Error: [IBM][CLI Driver] SQL30081N A communication error has been detected. Communication protocol being used: "TCP/IP". Communication API being used: "SOCKETS". Location where the error was detected: "192.168.253.135". Communication function detecting the error: "selectForConnectTimeout". Protocol specific error code(s): "115", "*", "*". SQLSTATE=08001
(08001:4294937215)
Check the SVCENAME parameter for the respective instance and ensure that this value is not empty.(08001:4294937215)
Mon, 01 Apr 2013 07:33:29 -0700 -- There was an error connecting to the database. Check that you have sufficient database privileges:
Database Error: [IBM][CLI Driver] SQL30081N A communication error has been detected. Communication protocol being used: "TCP/IP". Communication API being used: "SOCKETS". Location where the error was detected: "192.168.253.135". Communication function detecting the error: "selectForConnectTimeout". Protocol specific error code(s): "115", "*", "*". SQLSTATE=08001
(08001:4294937215)

Tech Links:
http://pic.dhe.ibm.com/infocenter/db2luw/v10r1/index.jsp?topic=%2Fcom.ibm.db2.luw.qb.server.doc%2Fdoc%2Ft0006066.html
Known issues in Tivoli Endpoint Manager 9.0
Client self assist - Technical Support Information for Tivoli Endpoint Manager Administrators


